GO Trick - The Window Shot
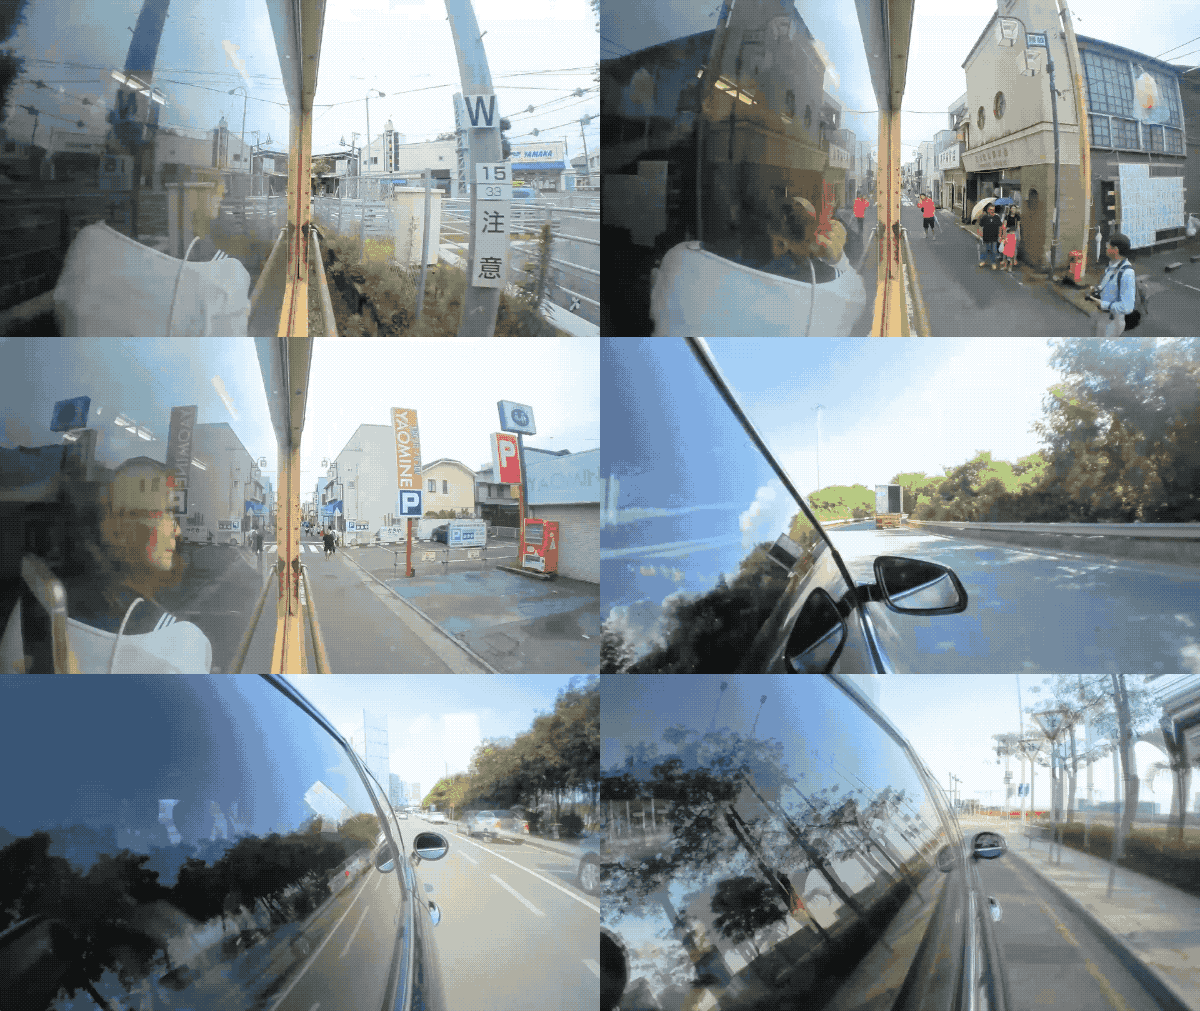
GO can be mounted just about anywhere. Seriously, even on flat glass with the Pivot Stand. This opens up a world of possibilities for shots. Planes, trains or a car ride, GO can get shots you’ve never seen before.
Gear used: Insta360 GO + Pivot Stand

Steps:
Step 1. The Setup
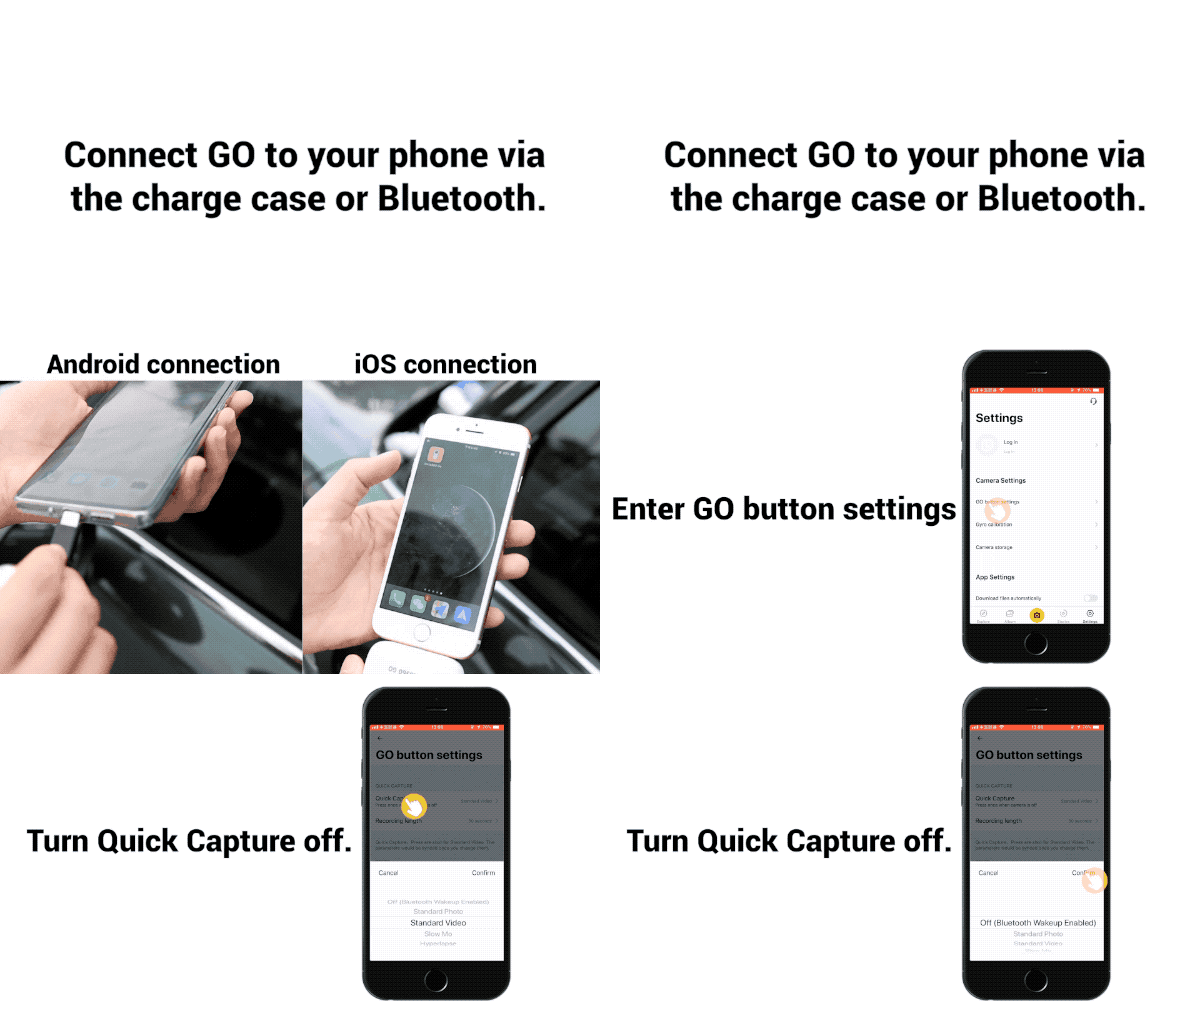
Connect GO to your phone via the charge case or Bluetooth. Open Insta360 GO App, enter GO button settings to turn Quick Capture off.
Step 2. The Prep
Pop GO in the Pivot Stand and tag it on a window. Tweak the angle, it’s best if you keep upright with the lens facing the direction you are going. If your Pivot Stand has lost stickiness, just give it a quick wash with a bit of water.

Step 3. The Shot
Open the app and tap the camera button at the bottom of the screen. Tap "BLUETOOTH CONTROL". The indicator flashes which indicates BLUETOOTH CONTROL successfully.

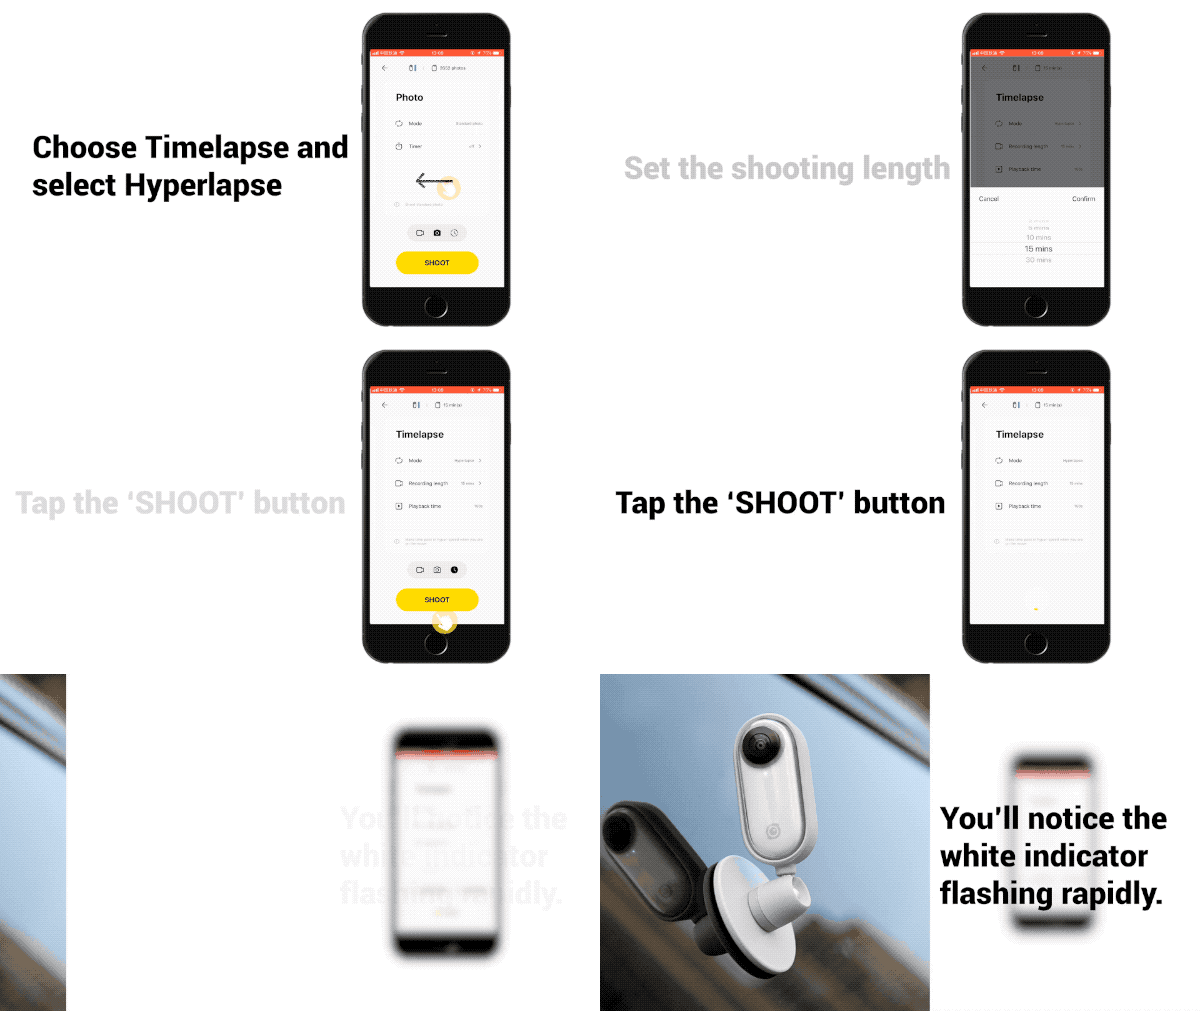
Choose Timelapse and select Hyperlapse. Tap the ‘SHOOT’ button, you’ll notice the white indicator flashing rapidly.
4. The Edit
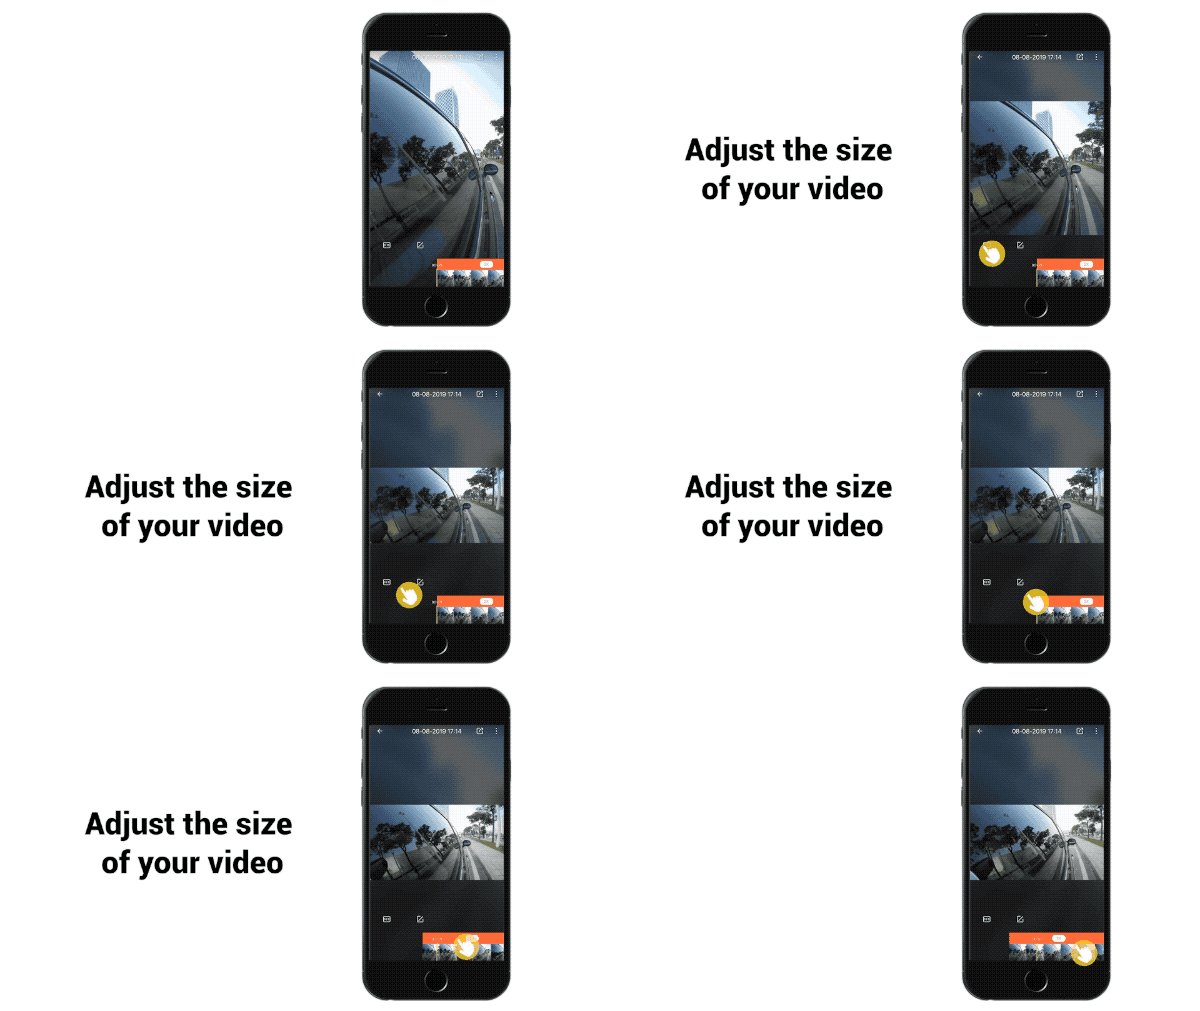
Connect GO to your phone, download and edit. Adjust the size of your video.
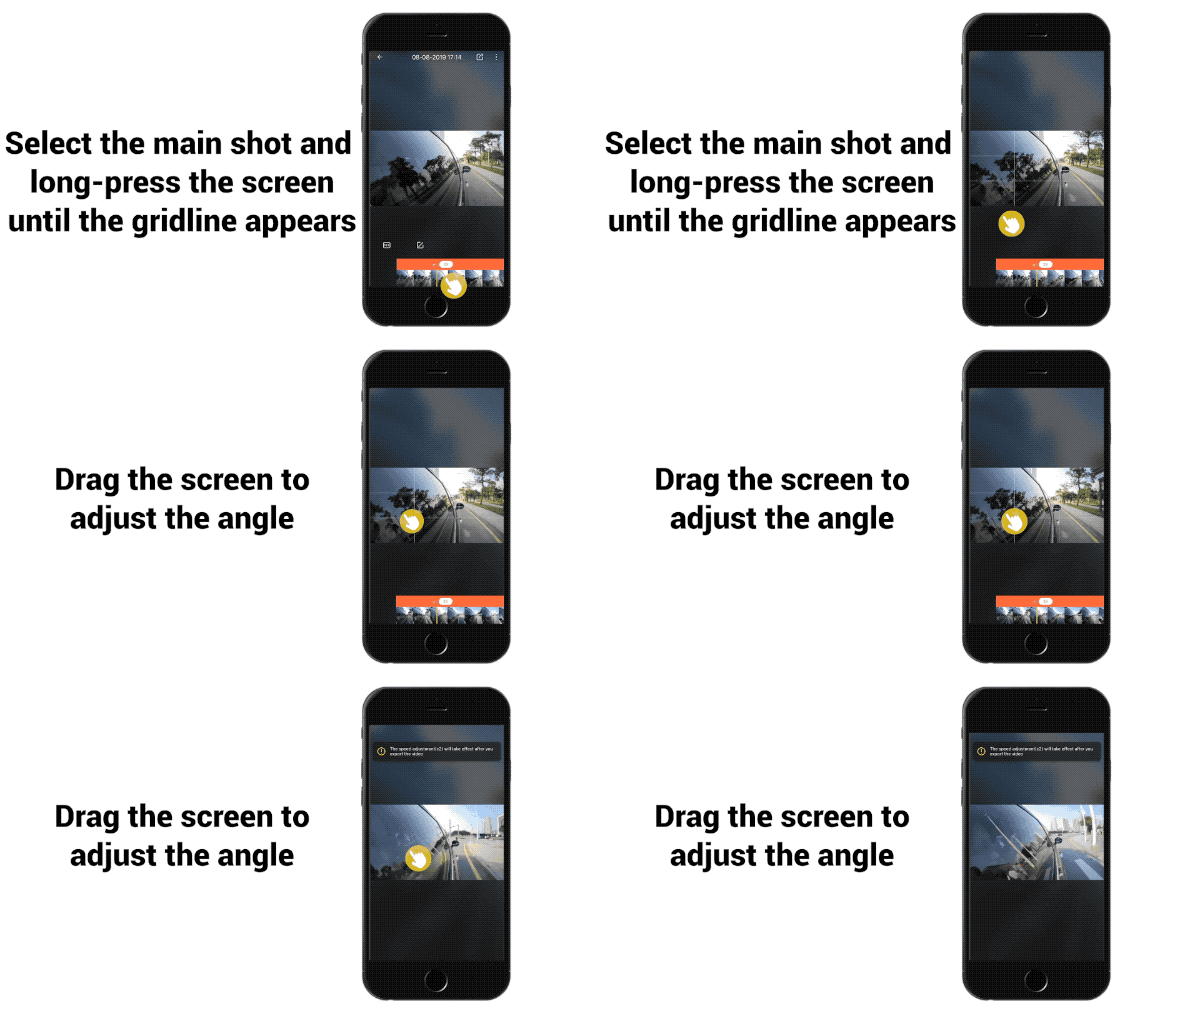
Select the main shot and long-press the screen until the gridline appears. Drag the screen to adjust the angle.
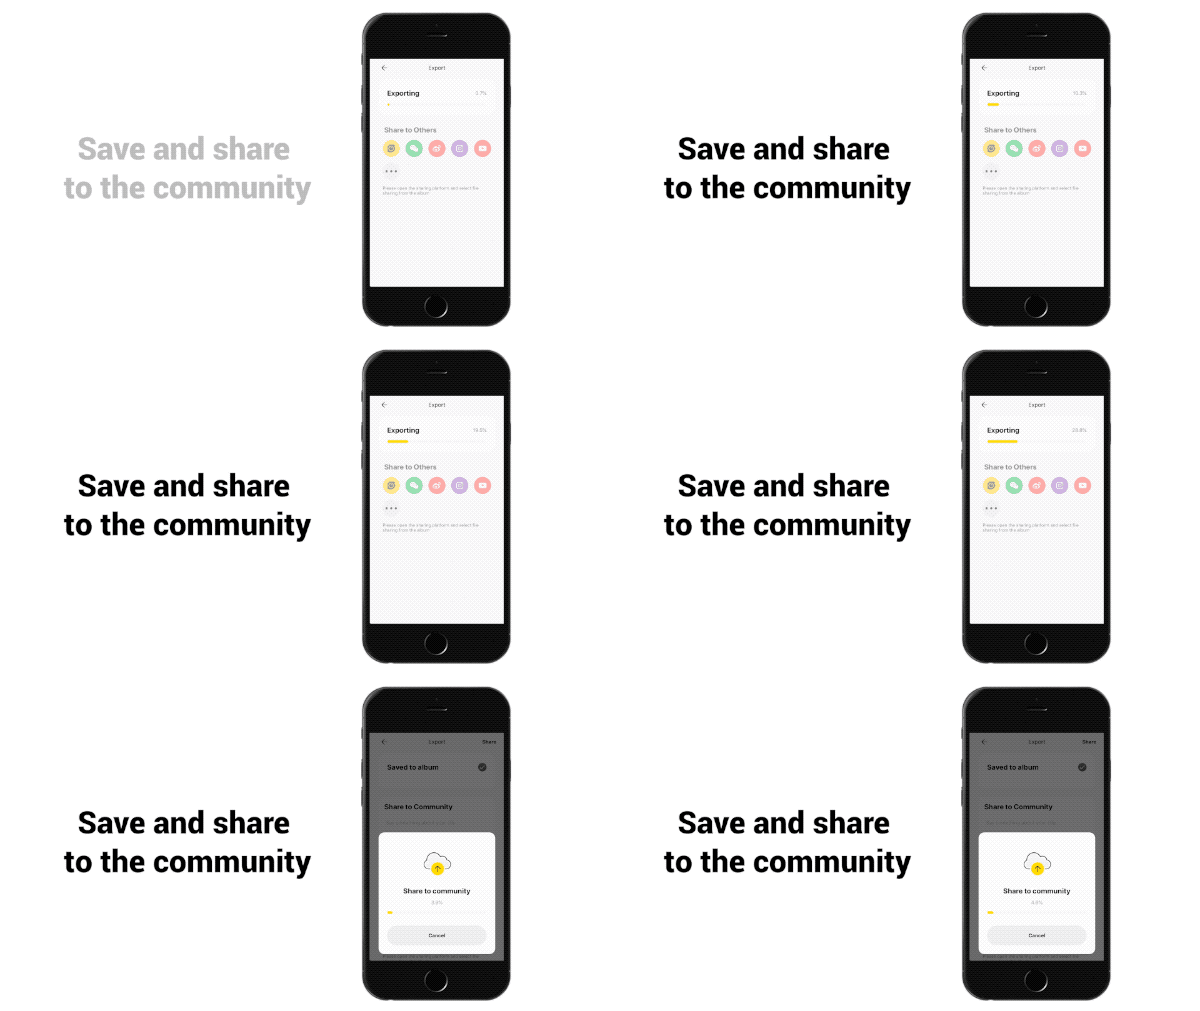
Save and share to the community.
Here are a few more shots for inspiration:
Note:
1. It will look best when the person inside is close to the glass.
2. If GO stays in standby mode for over 30 seconds, it will power off automatically. GO's effective Bluetooth range is 33 feet (10 meters) in optimal conditions.
3. It’s best to calibrate your gyro if you’re encountering odd movements in your video. Here’s How.