3 TRICKS to improve BULLET TIME technique #ProTipChallenge

Let’s see 3 tricks to unlock the full potential of Bullet Time technique!
Bullet Time is a slow-mo effect we can achieve by using an Insta360 camera and a string or a bullet time handle, while one of the main characteristics of the technique that we have to raise our hand to spin the camera.
In certain cases this hand-position may look unnatural. So in my previous post I’ve already mentioned some possible solutions, like holding an air balloon in hand or playing around with further accessories. But this time I show you what we can do in post-production and which is the coolest accessory we can choose for a bullet time video. (And I also share an extra trick with you.)
TIP #1 – PIMP IT UP WITH EDITING
One of the advantages of creative editing is we don’t have to bother with anything during shooting, and we can record everything as usual On the other hand, we have the freedom to play around with different solutions.
My first tip is to create a sparkler or torch effect, which will give a meaning to the weird hand position.

After shooting I have two options:
- I can create the base of the effect on smartphone, using the Effect Library of Insta360,
- or I can transfer my raw videos from the SD card to the computer and edit everything manually.
Working on smartphone I just simply export my Bullet Time video from the app, and transfer it to the computer for further editing.
Working on a computer, first I import my raw insv files into Premiere Pro. Then I make some basic corrections, like slowing down the video to half speed, setting up the centre point and fixing some accidental horizon issues. Actually, that’s how I create the bullet time video manually.
The point is to make sense of the hand position, so I add a torch, which fits to the base of the bullet time handle in the same time.
If you’re familiar with different blending modes, you don’t even need green screen videos. You can record any flame or sparkler in front of a dark (black) background or in a dark room, too.
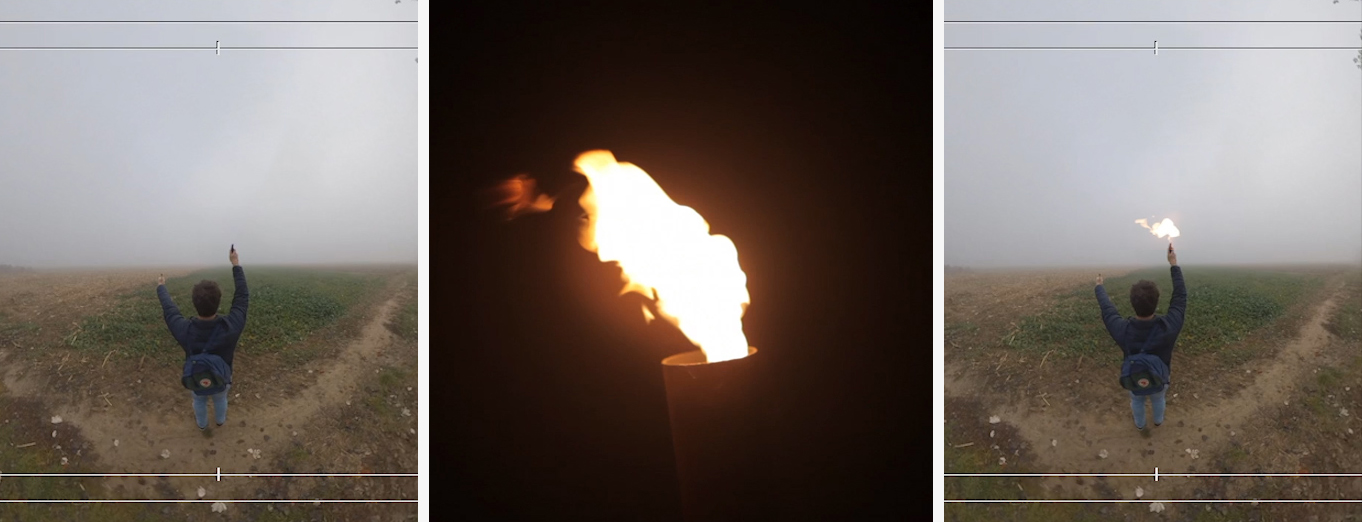
Then drag the footage over the bullet time video and switch the blending mode to Screen. This way the black background will disappear without having to use any masks or keying. Then resize the flame and move it in the starting position.
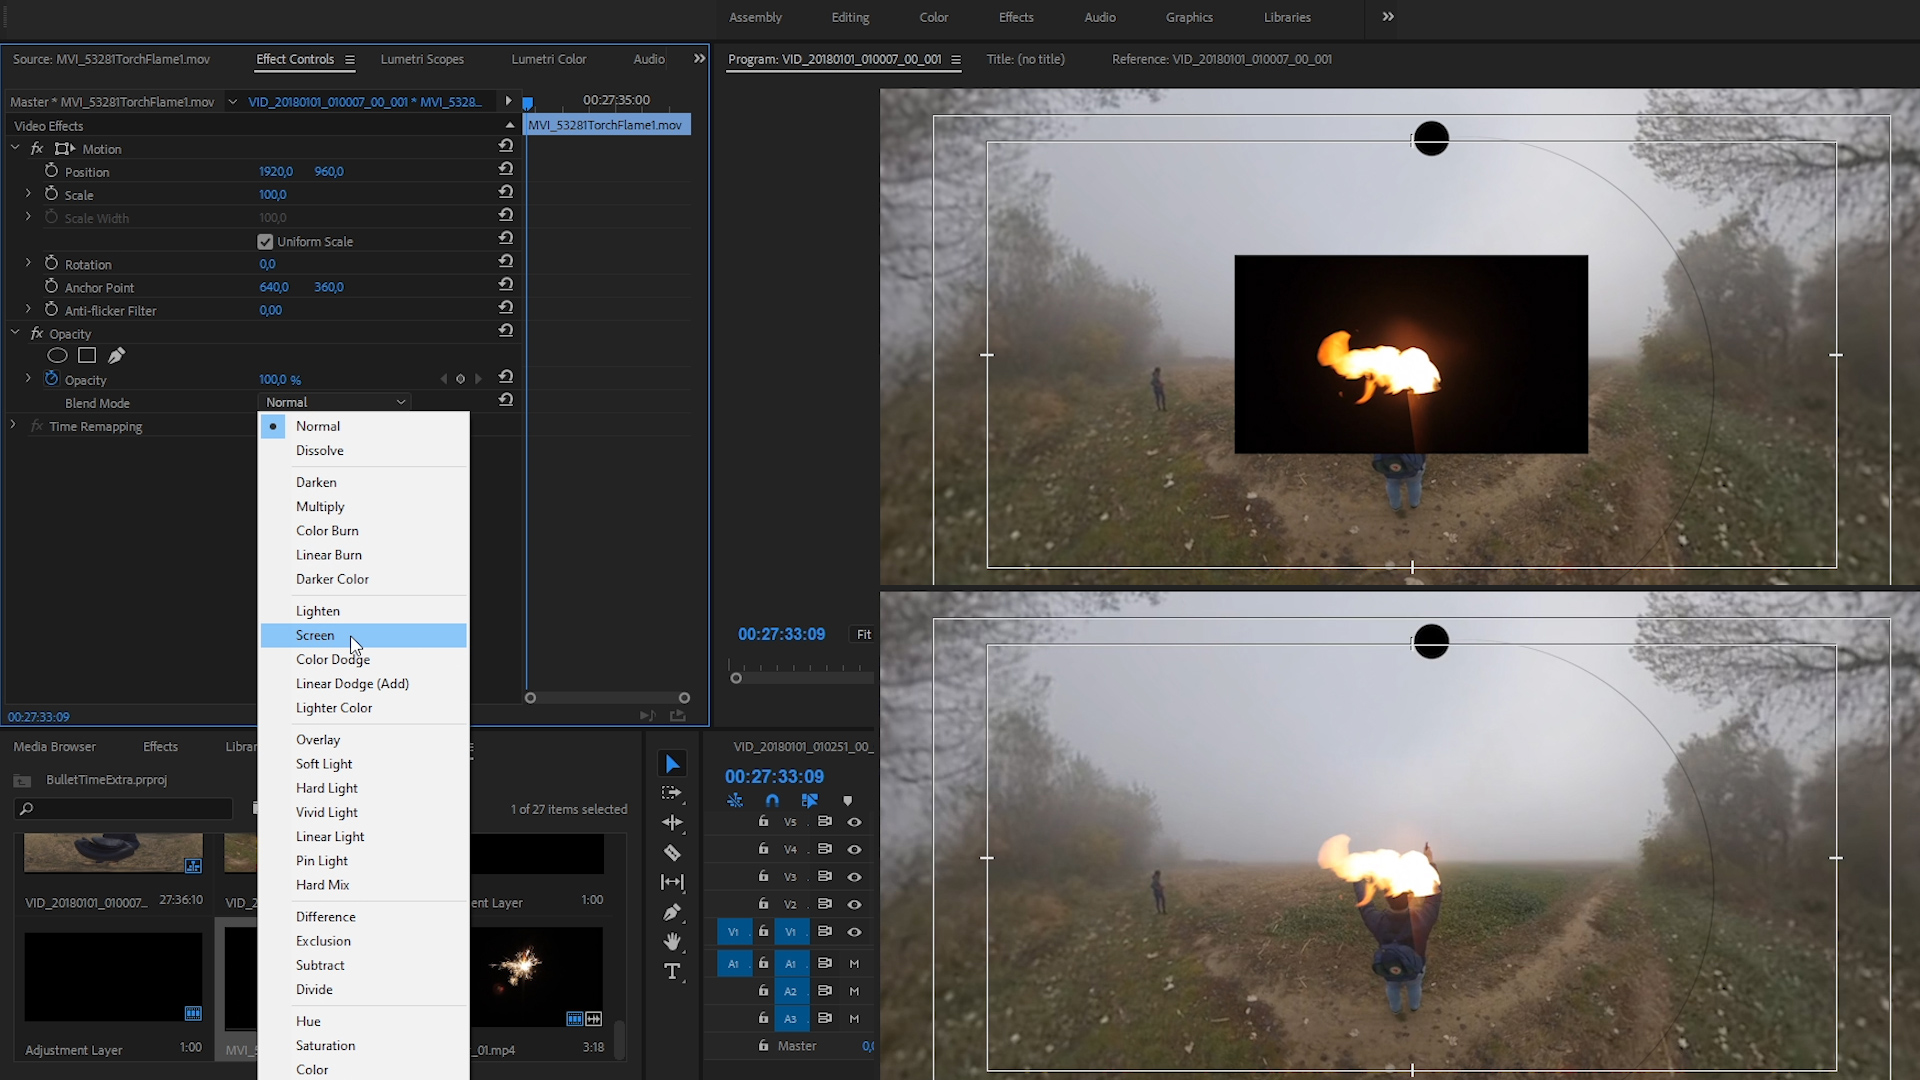
In most of the cases the handle is almost in the same position during Bullet Time videos, but you can create keyframes, if needed, “sticking’ the flame perfectly to the handle.

TIP #2 – PIMP IT UP DURING SHOOTING
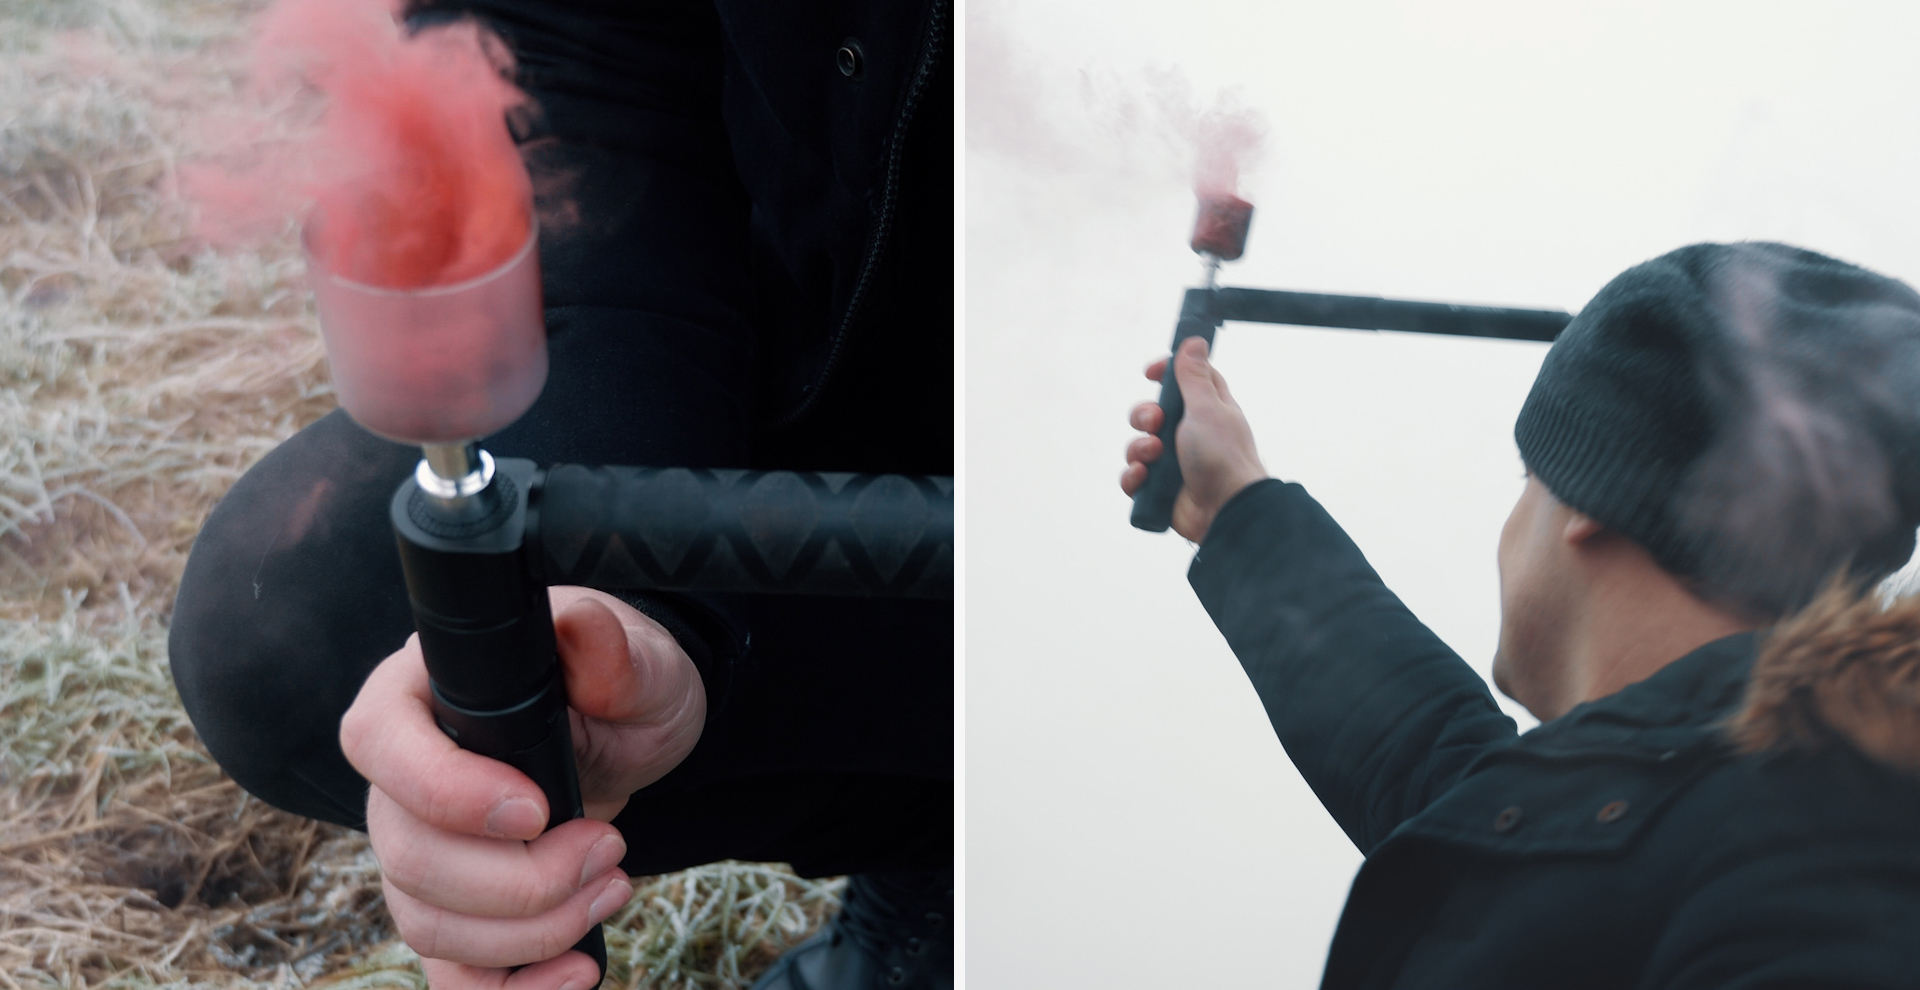
If you don’t want to spend your time editing, you can create such an effect for real, mounting a torch on top of your bullet time handle. But in this case, I try something else, playing around with a smoke bomb. And this time it will be 100 percent natural without any editing tricks.
How to do it?
Thanks to the construction of the bullet time handle, besides mounting the camera on the side, we can also fasten objects on the top of it. This time I attach a small handmade holder to a tiny smoke bomb.
I make a hole on top of a plastic cap from a detergent bottle, and insert a small smoke bomb into it. I light the smoke bomb and I’m ready to go.
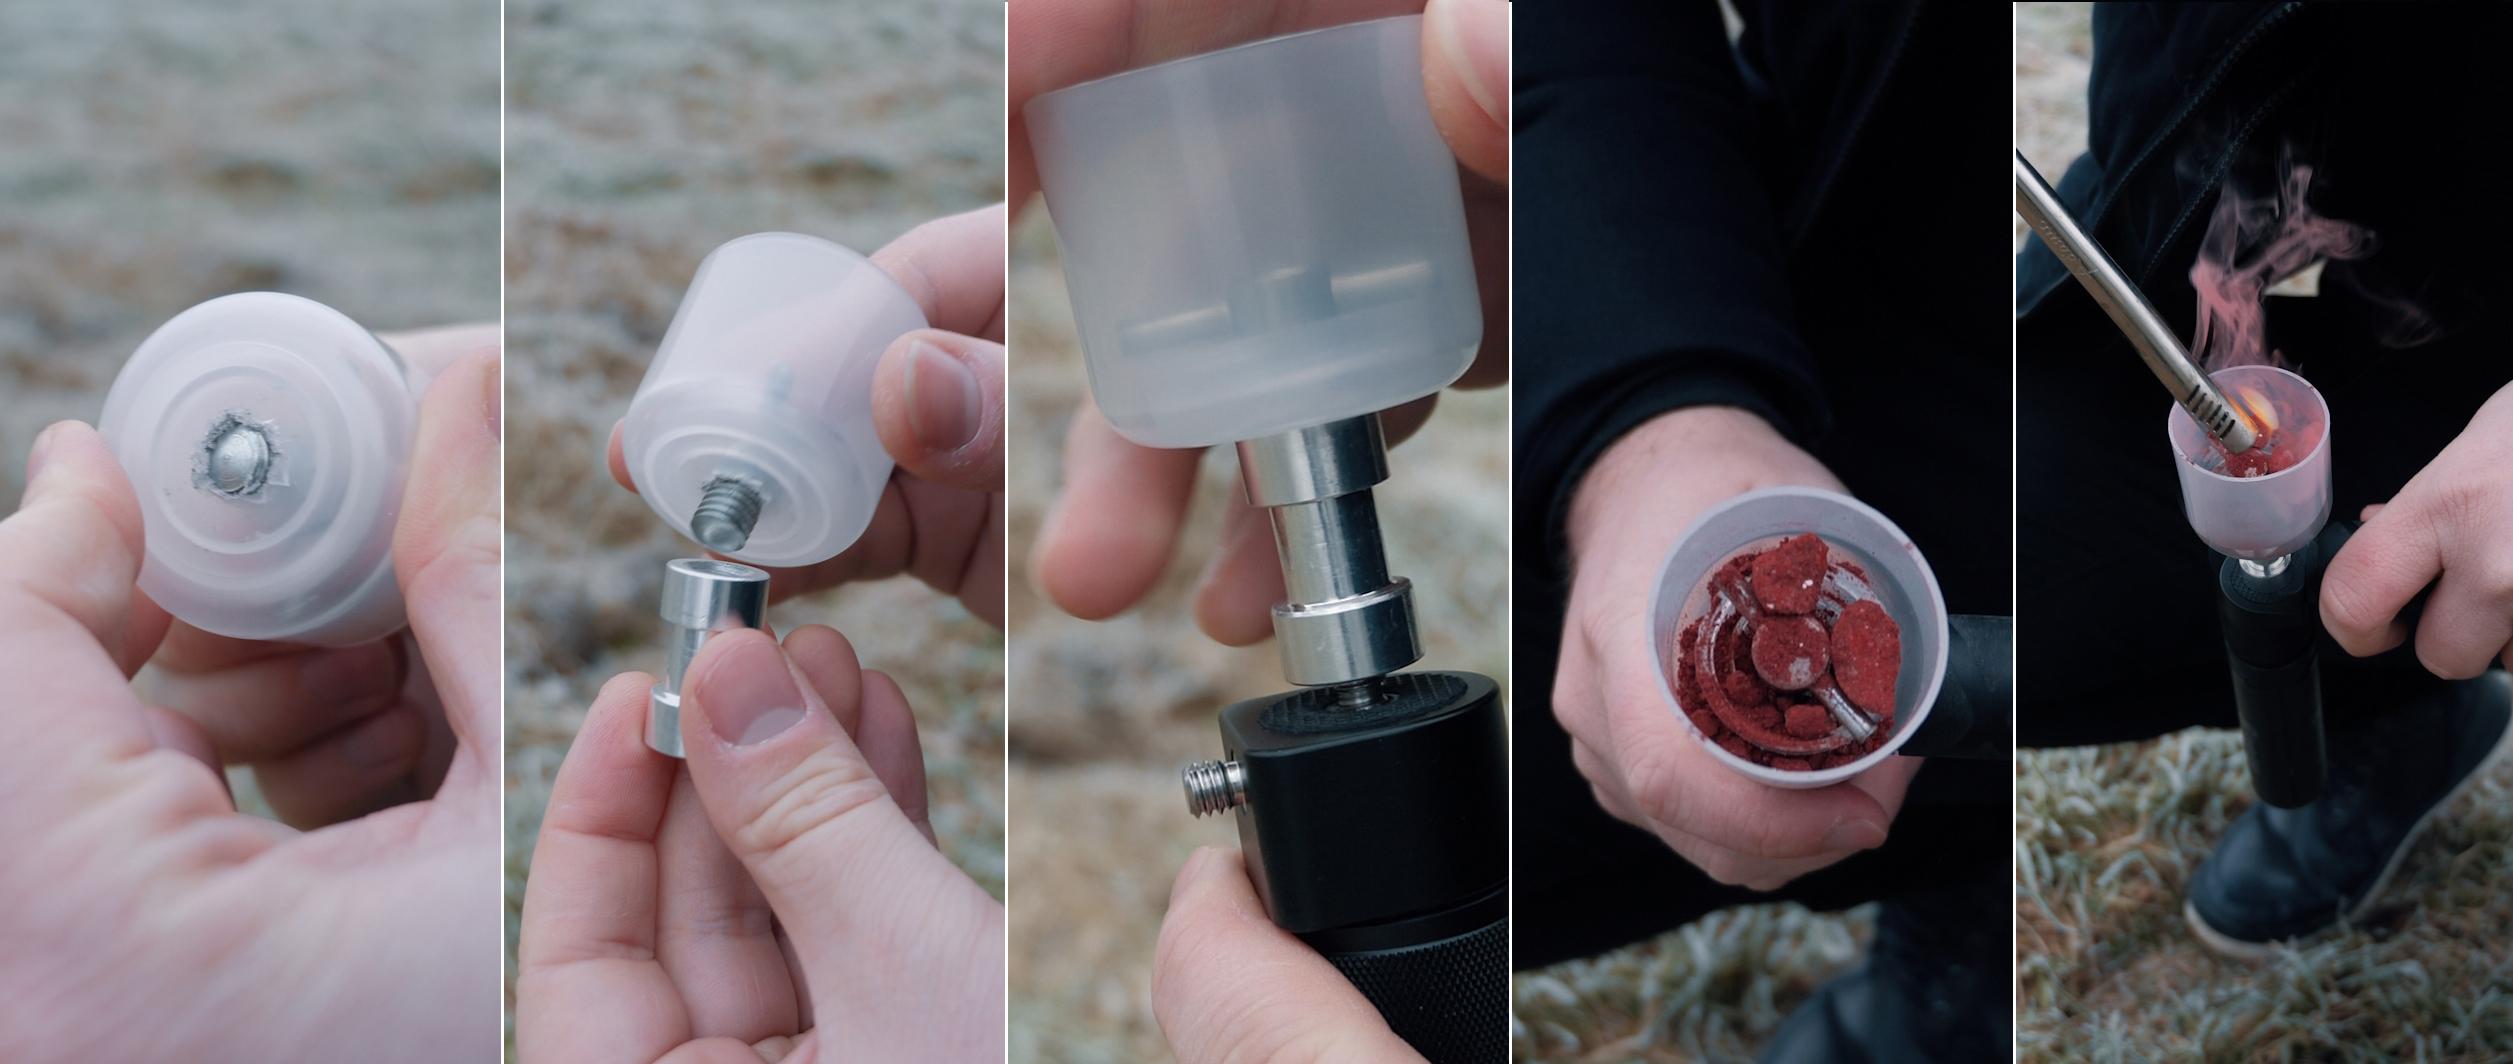
It looks quite similar as the sparkler effect, but it’s even more spectacular and 100 percent real. And the point is that I can shoot really cool bullet time videos this way, and no one will complain about the hand position in the scene. It’s obvious, that this is how I hold the smoke bomb, while the camera is panning around.
TIP #3 – PIMP IT UP WITH NEW ANGLES
Finally let me show you another trick, how we can play around with camera positions during Bullet Time recording.
All I have to do is inserting a tiny ball head in the structure to get really nice, lower angle bullet time shots.
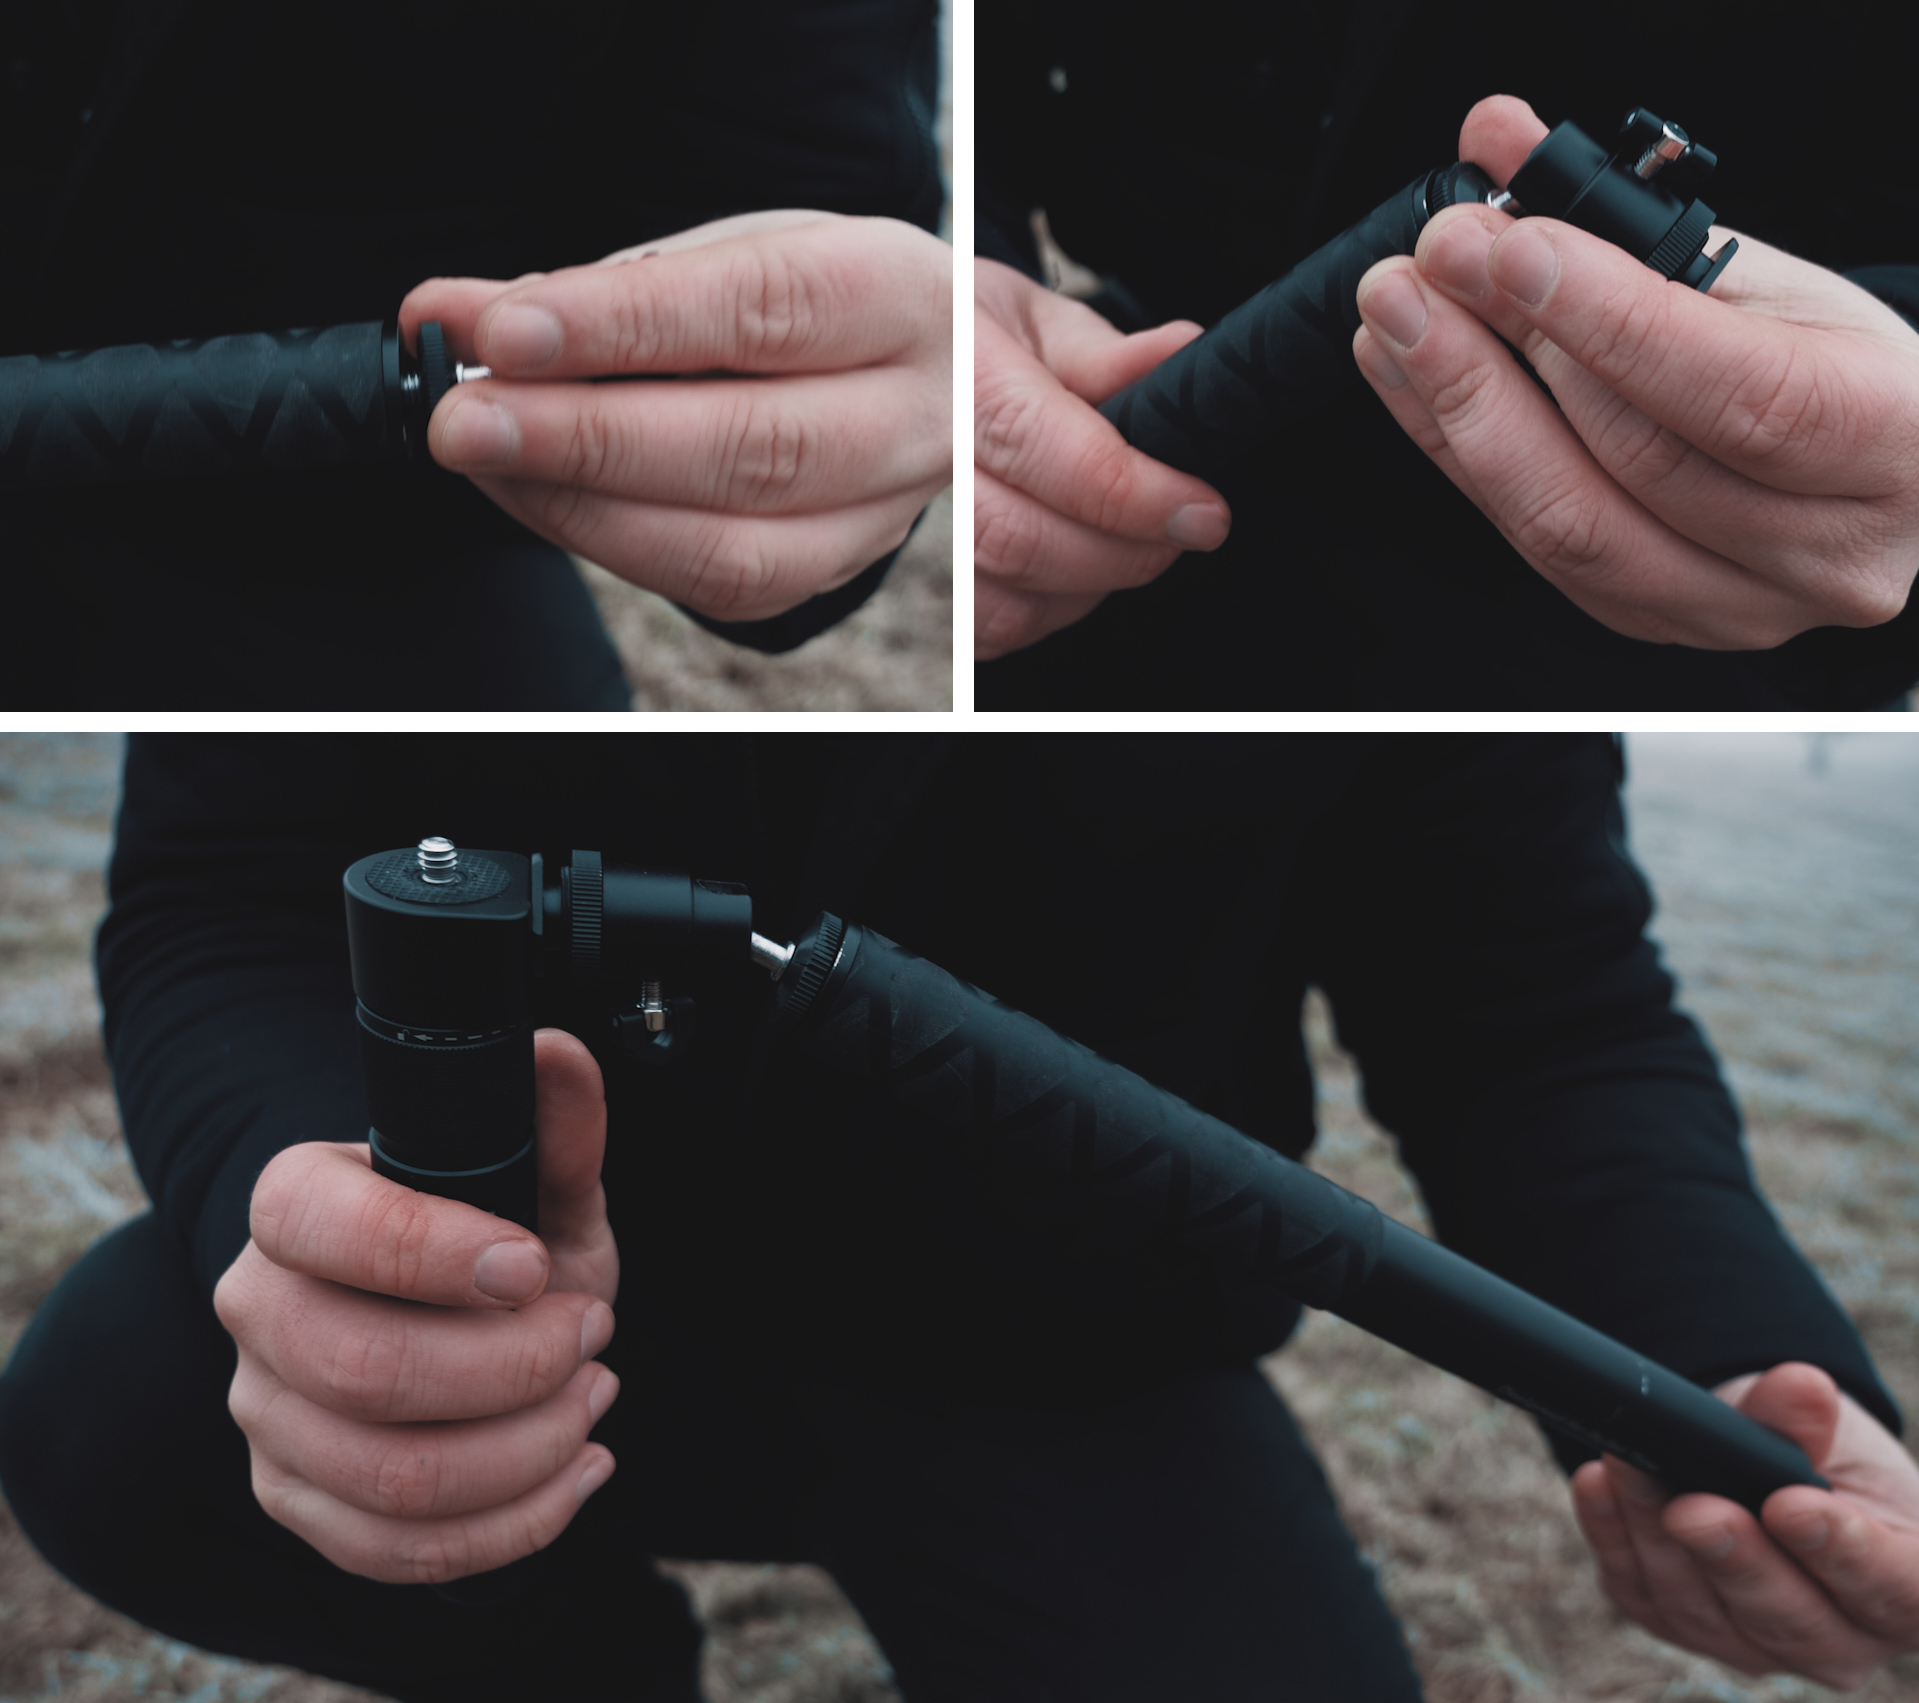
This way, the camera won’t be spinning around above my head, but in exciting lower angles. And depending on the ball head settings and the length of the selfie stick, I can get very cool camera movements.

Of course we can mix this technique with the smoke bomb or the torch effect, and it will look really cool.