ROLLING CLONES – Infinite loop around the Rabbit Hole #ProTipChallenge
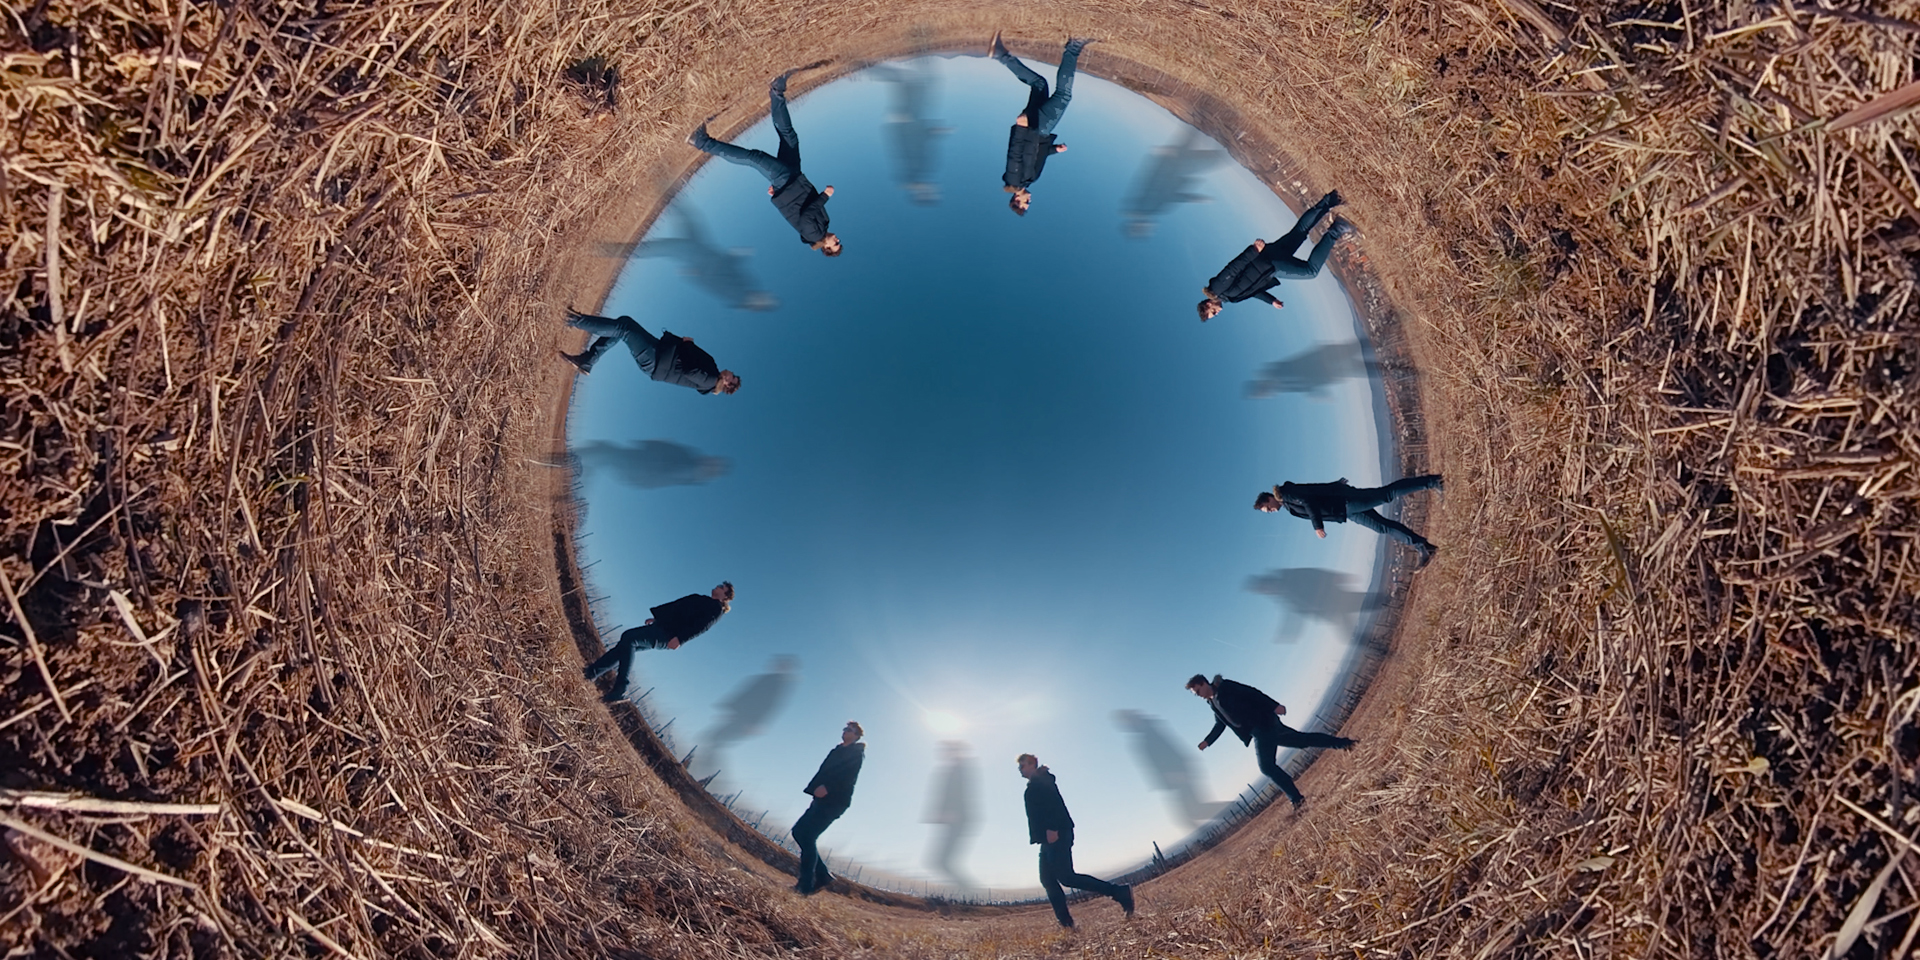
Let’s create a really cool effect, cloning ourselves and making an infinite loop of walking around the edge of the Rabbit Hole (or on a Tiny Planet)!
There are four main steps we are going through:
- we will record the raw material,
- we create an infinite loop of the walking video,
- we create the clones in different stages of the path,
- and finally we make a little planet or inverted planet / rabbit hole effect.
#1 Recording
First I select a location. This time I pick up a simple location where there’s nothing spectacular in the background, so we can focus on the effect itself. To create an inverted planet (which is actually we are going for) the lower camera position is the better. So I put the camera on the ground using a tiny tripod.
Then I start walking in circles, trying to keep the same distance from the camera.
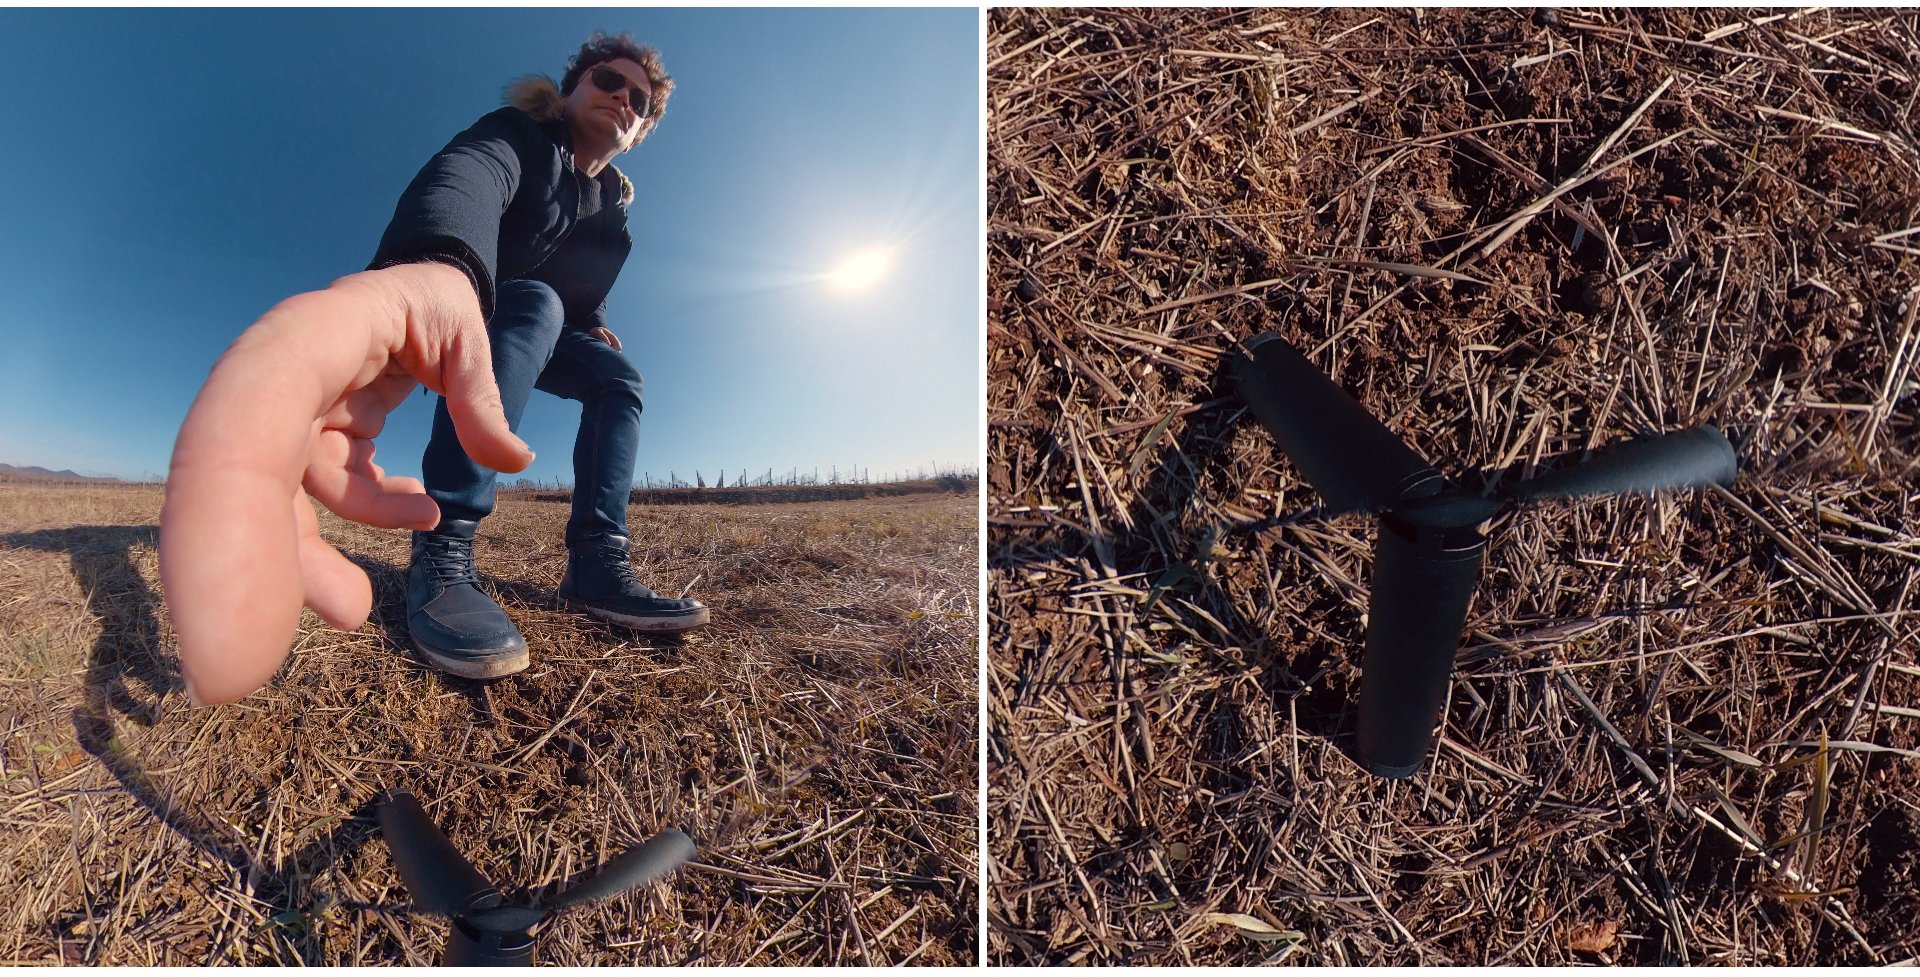
Tip: You can play around with different distances, but it’s very important to record at least one or two rounds in the same distance. If you don’t keep the distance, the final result won’t be perfect, as the size will be changing, as you’re getting closer or further from the camera.
#2 Creating an infinite loop
When I’m done with recording, I import the raw .insv files into Premiere Pro. I create a New sequence from the video and start editing.
To create an infinite loop I have to find the perfect moment to cut. I try to catch a moment, when my outlines fit perfectly.
If I was walking round and round keeping the same distance, it’s much easier:
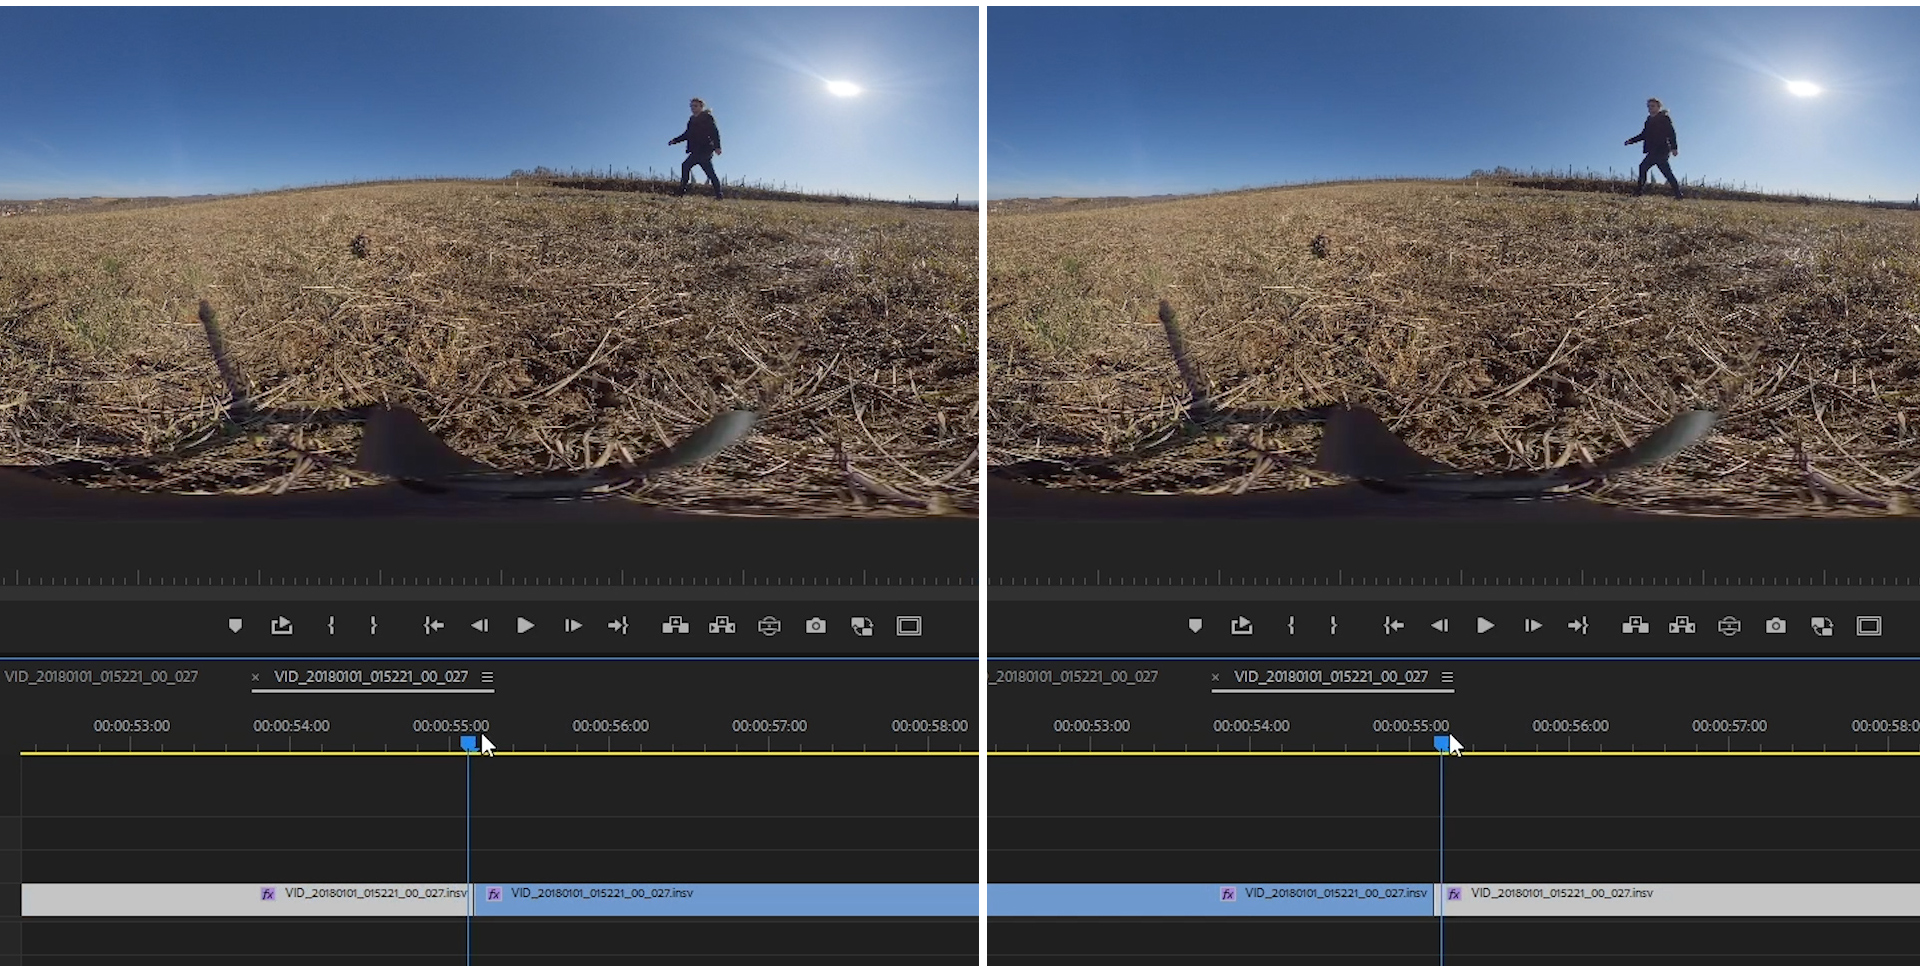
Then I can copy and paste this unit as many times as I want, and the transition will always be seamless, looking like I was walking around forever.
I just put the same events right after each other:

#3 Creating the walking clones
After the endless loop is created it’s time to create the clones in different stages of the scene.
First I duplicate a unit of the infinite loop I created, and animate a mask all along the scene. I turn off the background layer on the bottom, so I can see the borders of the mask perfectly, creating a spot-light-looking mask.
The further you walk from the camera, the more clones you can create to fill the scene.
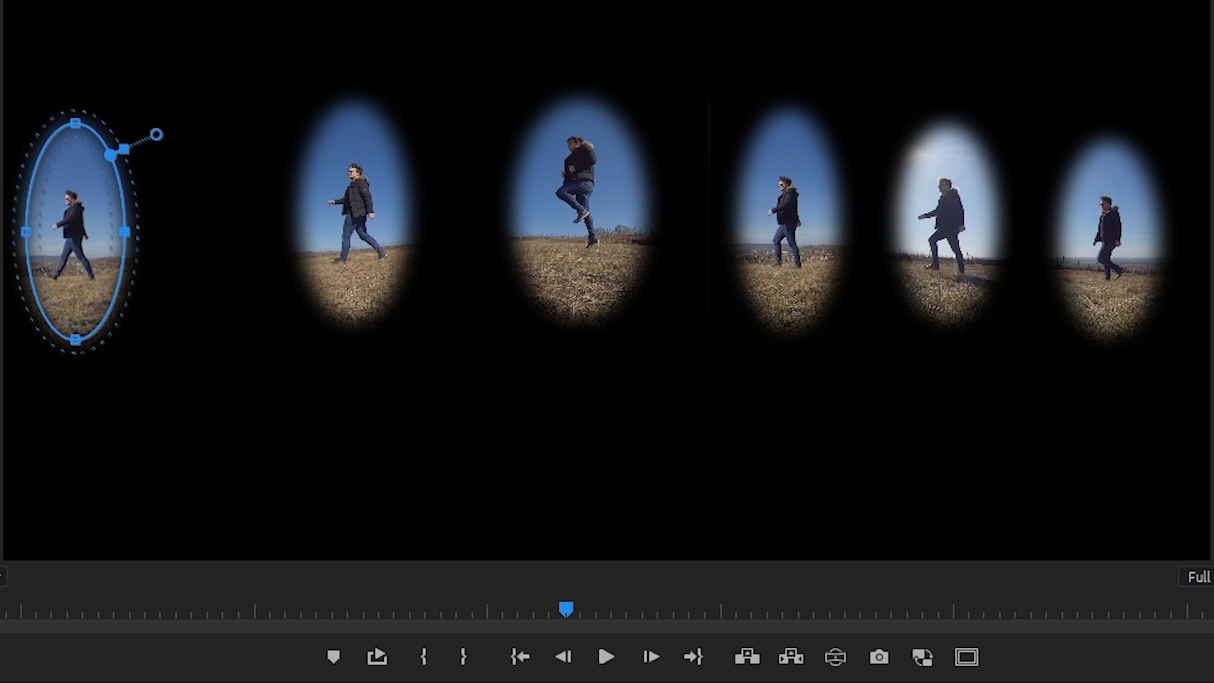
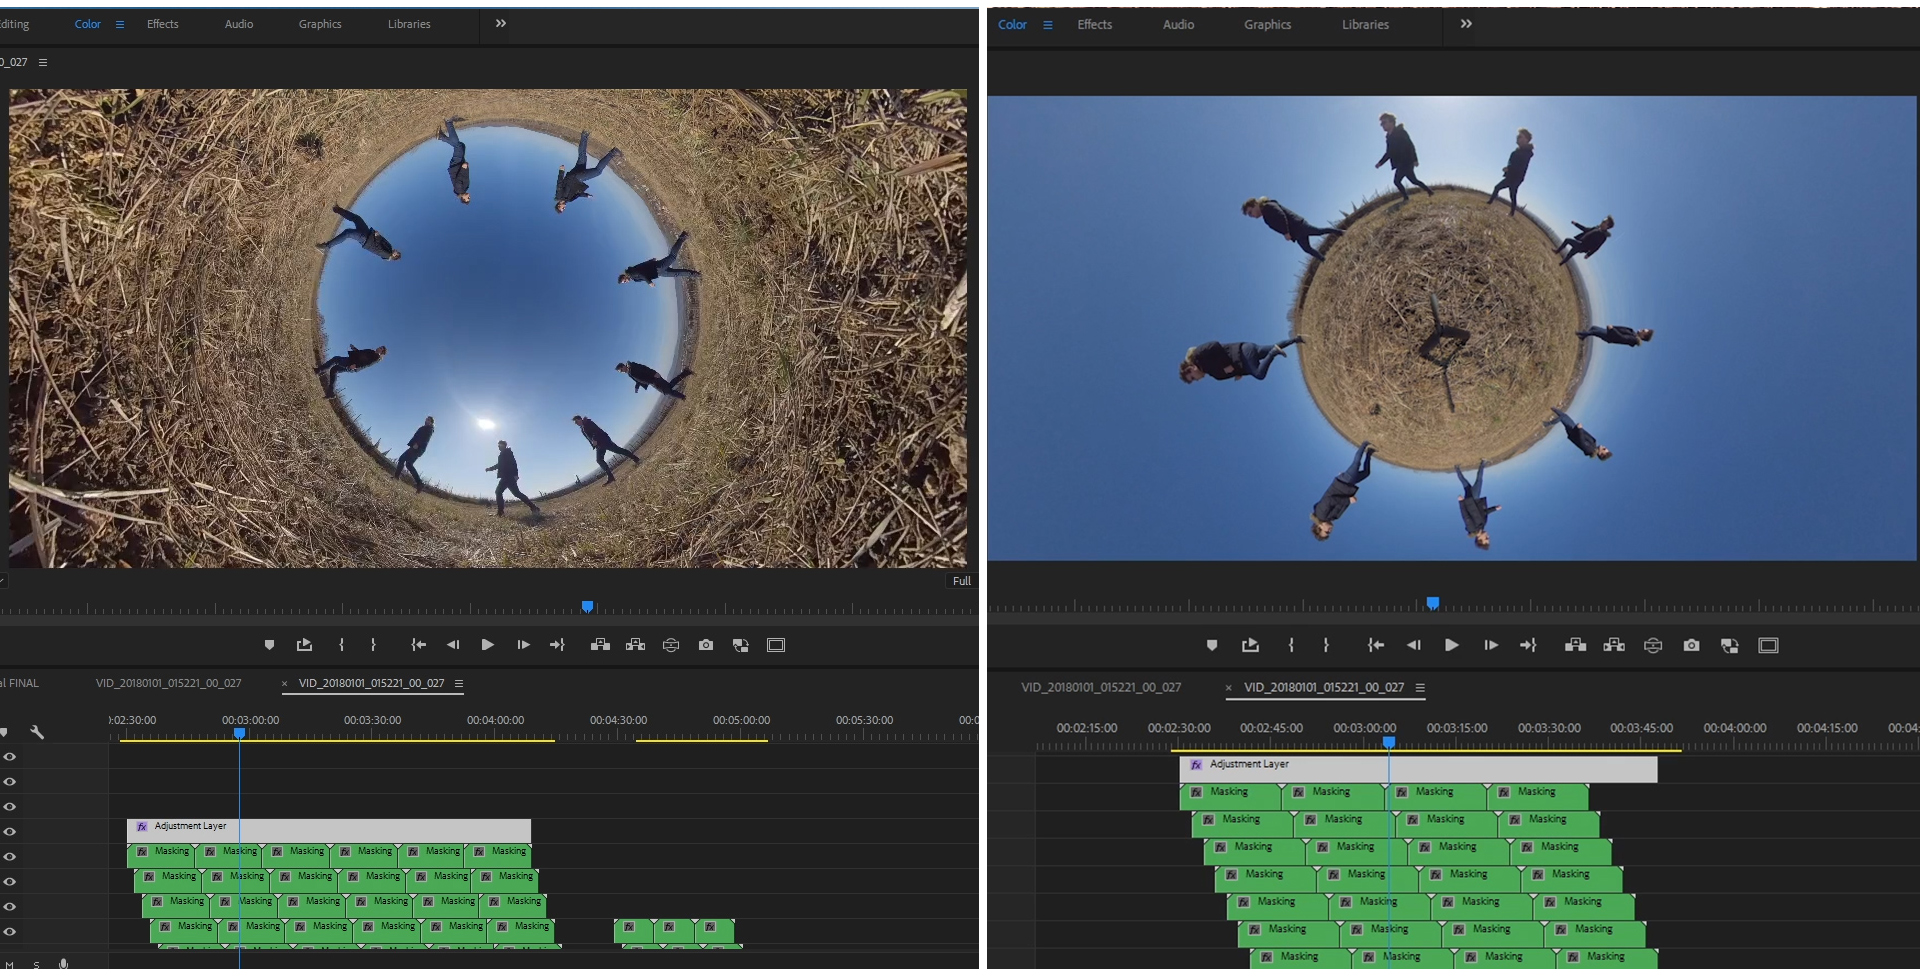
When I’m done with masking I nest this unit, so I can copy it without messing up anything. Even more, I can modify the mask anytime later, and it will be changing in all of the copies. (image on the left)
Then I just simply put these units after each other to create a longer sequence, and I have the same endless loop video on top of each other with and without mask. (image in the middle)
To create clones I shift the upper video a couple of frames backwards. The amount of the shifted frames depends on the size of the talent in the scene. (image on the right)

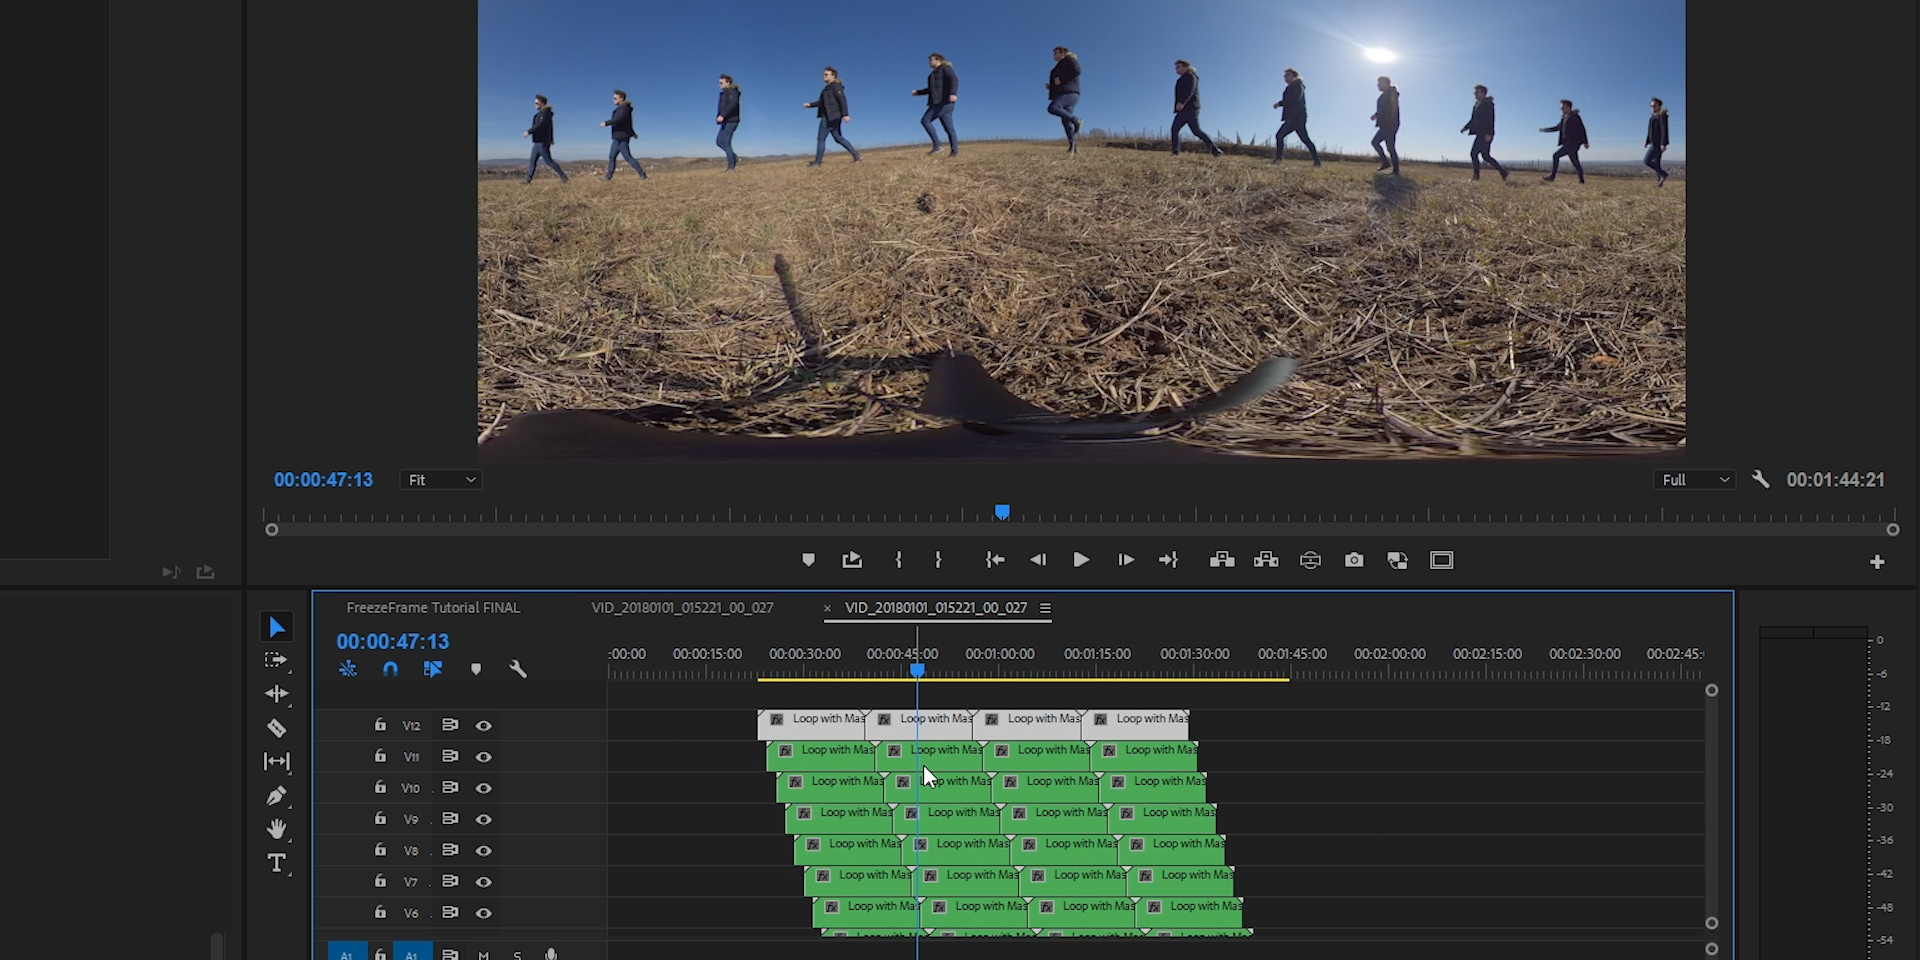
Then I repeat the same process a couple of times, copying, pasting and shifting the same units. I always use the same amount of shift, so there will be a constant distance between the clones. And finally I have a panoramic video with walking clones:
#4 Creating the Rabbit Hole with Reframing
When I’m done with cloning, I reframe all the sequence at once in a non-destructive way.
- I create an Adjustment layer and drag it over the whole sequence,
- and apply a Reframing plugin, like GoPro FX Reframe.
- Then I set the camera Tilt to 90 degrees to turn my virtual camera to the sky, and zoom out a little bit, if needed.
As I’m working on an Adjustment layer, the Reframing plugin affects all the layers below, so I don’t have to copy and paste this setting. Even more, all of the future changes I make will also affect all the layers in real time.
And of course, I can turn it on and off with one single click, for instance, when I’d like to modify the masks. Or I can create a Tiny Planet look really quickly: I just modify the Tilt parameter, turning my virtual camera to the ground, and maybe I play around with the Zoom a little bit and that’s all. I have full control over anything anytime, using this non-destructive workflow.
It's that easy to switch between Little Planet and Inverted Planet view, only by modifying the settings on the Adjustment layer over the same sequence:
